Android リストフラグメント
リストフラグメントの基本的な実装は、フラグメント内に項目リストを作成するために使用されます。

例
この例では、ArrayAdapter に基づいてリストフラグメントを作成する方法を説明します。次の手順から始めましょう。
| 手順 | 説明 |
|---|---|
| 1 | Android Studio を使用して Android アプリケーションを作成し、List Fragment という名前を付け、パッケージ名を cn.uprogrammer.listfragment とします。 |
| 2 | 文字列ファイルを変更し、res/values/string.xml に新しい文字列定数を追加します。 |
| 3 | res/layout の下に list_fragment.xml という名前のレイアウトファイルを作成してリストフラグメントを定義し、activity_main.xml に追加します。 |
| 4 | MyListFragment.java ファイルを作成します。これには onCreateView()、onActivityCreated()、OnItemClickListener() が含まれます。 |
| 5 | Android エミュレータを起動してアプリケーションを実行し、アプリケーションに対して行った変更の結果を確認します。 |
コーディングを開始する前に、res/values ディレクトリの string.xml で文字列定数を初期化します。
<?xml version="1.0" encoding="utf-8"?>
<resources>
    <string name="app_name">listfragment</string>
    <string name="action_settings">Settings</string>
    <string name="hello_world">Hello world!</string>
    <string name="title_activity_main">List Fragment Demo</string>
    <string name="imgdesc">imgdesc</string>

    <string-array name="Planets">
        <item>Sun</item>
        <item>Mercury</item>
        <item>Venus</item>
        <item>Earth</item>
        <item>Mars</item>
        <item>Jupiter</item>
        <item>Saturn</item>
        <item>Uranus</item>
        <item>Neptune</item>
    </string-array>

</resources>
以下は res/layout/activity_main.xml ファイルの内容です。リニアレイアウトとフラグメントタグが含まれています。
<?xml version="1.0" encoding="utf-8"?>
<LinearLayout
    xmlns:android="http://schemas.android.com/apk/res/android"
    android:layout_width="match_parent"
    android:layout_height="match_parent"
    android:orientation="vertical" >

    <fragment
        android:id="@+id/fragment1"
        android:name="cn.uprogrammer.listfragment.MyListFragment"
        android:layout_width="match_parent"
        android:layout_height="match_parent" />

</LinearLayout>
以下は res/layout/list_fragment.xml ファイルの内容です。リニアレイアウト、リストビュー、TextView が含まれています。
<?xml version="1.0" encoding="utf-8"?>
<LinearLayout
    xmlns:android="http://schemas.android.com/apk/res/android"
    android:layout_width="match_parent"
    android:layout_height="match_parent"
    android:orientation="vertical" >

    <ListView
        android:id="@android:id/list"
        android:layout_width="match_parent"
        android:layout_height="wrap_content" >
    </ListView>

    <TextView
        android:id="@android:id/empty"
        android:layout_width="match_parent"
        android:layout_height="wrap_content" >
    </TextView>

</LinearLayout>
以下は src/cn.uprogrammer.listfragment/MyListFragment.java ファイルの内容です。コーディングを開始する前に、以下の手順に従う必要があります。
- ListFragment を継承する MyListFragment クラスを作成します。
- onCreateView() メソッド内で、上記で定義した list_fragment XML レイアウトを使用してビューをインフレートします。
- onActivityCreated() メソッド内で、string.xml で定義された文字列配列 R.array.planet リソースを使用して ArrayAdapter を作成し、そのアダプタをリストビューに設定し、リスト項目のクリックリスナーを設定します。
- onItemClickListener() メソッド内で、トーストメッセージを使用してクリックされた項目の位置を表示します。
package cn.uprogrammer.listfragment;

import android.app.ListFragment;

import android.annotation.SuppressLint;
import android.app.ListFragment;
import android.os.Bundle;

import android.view.LayoutInflater;
import android.view.View;
import android.view.ViewGroup;

import android.widget.AdapterView;
import android.widget.AdapterView.OnItemClickListener;
import android.widget.ArrayAdapter;
import android.widget.Toast;

public class MyListFragment extends ListFragment implements OnItemClickListener {
    @Override
    public View onCreateView(LayoutInflater inflater, ViewGroup container, Bundle savedInstanceState) {
        View view = inflater.inflate(R.layout.list_fragment, container, false);
        return view;
    }

    @Override
    public void onActivityCreated(Bundle savedInstanceState) {
        super.onActivityCreated(savedInstanceState);
        ArrayAdapter adapter = ArrayAdapter.createFromResource(getActivity(), R.array.Planets, android.R.layout.simple_list_item_1);
        setListAdapter(adapter);
        getListView().setOnItemClickListener(this);
    }

    @Override
    public void onItemClick(AdapterView<?> parent, View view, int position,long id) {
        Toast.makeText(getActivity(), "Item: " + position, Toast.LENGTH_SHORT).show();
    }
}
以下のコードは MainActivity.java の内容です:
package cn.uprogrammer.listfragment;

import android.app.Activity;
import android.os.Bundle;

public class MainActivity extends Activity {

    @Override
    protected void onCreate(Bundle savedInstanceState) {
        super.onCreate(savedInstanceState);
        setContentView(R.layout.activity_main);
    }
}
以下は AndroidManifest.xml ファイルの内容です:
<?xml version="1.0" encoding="utf-8"?>
<manifest xmlns:android="http://schemas.android.com/apk/res/android"
    package="cn.uprogrammer.listfragment">

    <application
        android:icon="@drawable/ic_launcher"
        android:label="@string/app_name"
        android:theme="@style/AppTheme" >

        <activity
            android:name=".MainActivity"
            android:label="@string/title_activity_main" >

            <intent-filter>
                <action android:name="android.intent.action.MAIN" />
                <category android:name="android.intent.category.LAUNCHER"/>
            </intent-filter>

        </activity>

    </application>
</manifest>
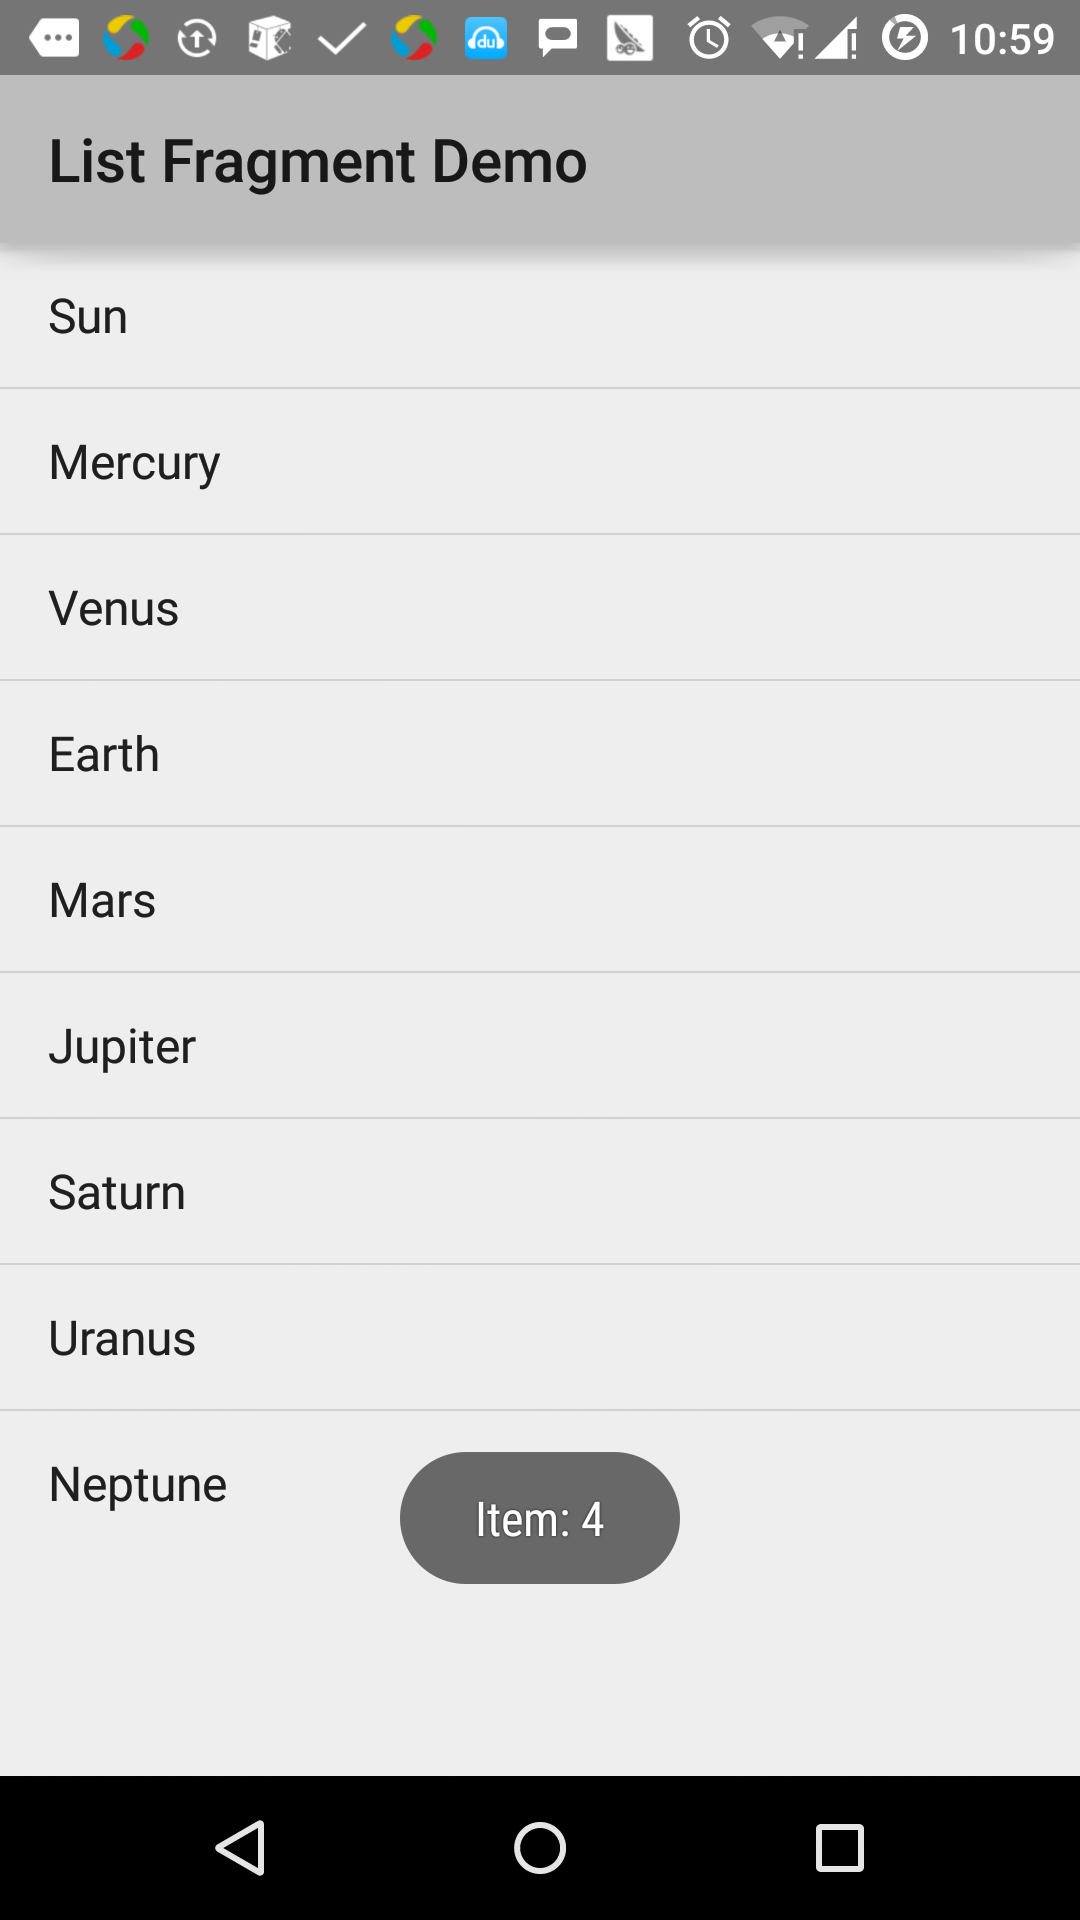
変更した List Fragment アプリケーションを実行してみましょう。インストール環境の作成時に AVD を作成したと想定します。プロジェクト内のアクティビティファイルを開き、ツールバーの アイコンをクリックして Android Studio でアプリケーションを実行します。Android Studio は AVD にアプリケーションをインストールして起動します。すべてが順調に進めば、エミュレータウィンドウに次のように表示されます: