Android ブロードキャストレシーバー(Broadcast Receivers)
ブロードキャストレシーバーは、他のアプリケーションやシステムからのブロードキャストメッセージに応答するために使用されます。これらのメッセージは、イベントまたはインテントと呼ばれることもあります。例えば、アプリケーションは、データがデバイスにダウンロードされ、利用可能になったことを他のアプリケーションに知らせるためにブロードキャストを開始できます。このようにして、ブロードキャストレシーバーはこれらの通信を傍受する適切なアクションを定義できます。
システムのブロードキャストインテントをブロードキャストレシーバーと連携させるには、次の2つの重要な手順があります。
- ブロードキャストレシーバーの作成
- ブロードキャストレシーバーの登録
さらに追加の手順として、カスタムインテントを実装するには、これらのインテントを作成してブロードキャストする必要があります。
ブロードキャストレシーバーの作成
ブロードキャストレシーバーは、BroadcastReceiverクラスのサブクラスとして実装し、Intentオブジェクトをパラメータとして受け取るonReceive()メソッドをオーバーライドする必要があります。
public class MyReceiver extends BroadcastReceiver {
   @Override
   public void onReceive(Context context, Intent intent) {
      Toast.makeText(context, "Intent Detected.", Toast.LENGTH_LONG).show();
   }
}
ブロードキャストレシーバーの登録
アプリケーションは、AndroidManifest.xmlでブロードキャストレシーバーを登録することで、指定されたブロードキャストインテントを監視します。ここでは、システムが生成するACTION_BOOT_COMPLETEDイベントを監視するためにMyReceiverを登録すると仮定します。このイベントは、Androidシステムの起動プロセスが完了したときに発行されます。

<application
   android:icon="@drawable/ic_launcher"
   android:label="@string/app_name"
   android:theme="@style/AppTheme" >
   <receiver android:name="MyReceiver">

      <intent-filter>
         <action android:name="android.intent.action.BOOT_COMPLETED">
         </action>
      </intent-filter>

   </receiver>
</application>
これで、Androidデバイスが起動されるたびに、ブロードキャストレシーバーMyReceiverによって傍受され、onReceive()で実装されたロジックが実行されます。
システムによって生成される多くのイベントが、Intentクラスの静的定数値として定義されています。次の表に、重要なシステムイベントを示します。
| イベント定数 | 説明 |
|---|---|
| android.intent.action.BATTERY_CHANGED | 永続的なブロードキャスト。バッテリーの充電状態、レベル、その他の情報が含まれます。 |
| android.intent.action.BATTERY_LOW | デバイスのバッテリー低下状態を示します。 |
| android.intent.action.BATTERY_OKAY | バッテリーが低下した後、現在は回復したことを示します。 |
| android.intent.action.BOOT_COMPLETED | システムの起動完了後に1回ブロードキャストされます。 |
| android.intent.action.BUG_REPORT | バグを報告するアクティビティを表示します。 |
| android.intent.action.CALL | データで指定された相手に電話を発信します。 |
| android.intent.action.CALL_BUTTON | ユーザーが「通話」ボタンをクリックすると、ダイヤラーまたは他の適切なダイヤルインターフェースが開きます。 |
| android.intent.action.DATE_CHANGED | 日付が変更されました。 |
| android.intent.action.REBOOT | デバイスが再起動されました。 |
カスタムインテントのブロードキャスト
アプリケーション内でカスタムインテントを生成して送信したい場合は、アクティビティクラスでsendBroadcast()を使用してこれらのインテントを作成し、送信する必要があります。sendStickyBroadcast(Intent)メソッドを使用すると、インテントはスティッキー(sticky)になります。つまり、送信したインテントはブロードキャスト完了後も保持され続けます。
public void broadcastIntent(View view)
{
   Intent intent = new Intent();
   intent.setAction("com.サンプル.CUSTOM_INTENT");
   sendBroadcast(intent);
}
com.サンプル.CUSTOM_INTENT インテントは、以前システム生成インテントを登録したのと同じ方法で登録できます。
<application
   android:icon="@drawable/ic_launcher"
   android:label="@string/app_name"
   android:theme="@style/AppTheme" >
   <receiver android:name="MyReceiver">

      <intent-filter>
         <action android:name="com.サンプル.CUSTOM_INTENT">
         </action>
      </intent-filter>

   </receiver>
</application>
例
この例では、カスタムインテントを傍受するブロードキャストレシーバーを作成する方法を説明します。カスタムインテントに慣れたら、システム生成インテントを傍受するようにアプリケーションをプログラムできます。以下の手順に従って、Hello World の例の章で作成したAndroidアプリケーションを変更してみましょう。
| 手順 | 説明 |
|---|---|
| 1 | Android Studioを使用してAndroidアプリケーションを作成し、broadcastreceiverという名前を付け、Hello Worldの例の章のcom.サンプル.broadcastreceiverパッケージの下に配置します。 |
| 2 | メインのアクティビティファイルMainActivity.javaを変更して、broadcastIntent()メソッドを追加します。 |
| 3 | com.サンプル.broadcastreceiverパッケージの下に、ブロードキャストレシーバーを定義する新しいJavaファイルMyReceiver.javaを作成します。 |
| 4 | アプリケーションは、1つまたは複数のカスタムまたはシステムのインテントを、制限なしで処理できます。傍受したい各インテントは、<receiver.../>タグを使用してAndroidManifest.xmlで登録する必要があります。 |
| 5 | res/layout/activity_main.xmlファイルのデフォルトコンテンツを変更して、インテントをブロードキャストするボタンを含めます。 |
| 6 | 文字列ファイルを変更する必要はありません。Android Studioがstring.xmlファイルを処理します。 |
| 7 | Androidエミュレーターを起動してアプリケーションを実行し、アプリケーションに加えた変更の結果を確認します。 |
以下は、変更したメインアクティビティファイル src/com.サンプル.broadcastreceiver/MainActivity.java の内容です。このファイルには、基本的なライフサイクルメソッドがすべて含まれています。カスタムイベントをブロードキャストするためのbroadcastIntent()メソッドを追加しました。
package com.サンプル.broadcastreceiver;

import android.os.Bundle;
import android.app.Activity;
import android.view.Menu;
import android.content.Intent;
import android.view.View;

public class MainActivity extends Activity {

    @Override
    public void onCreate(Bundle savedInstanceState) {
        super.onCreate(savedInstanceState);
        setContentView(R.layout.activity_main);
    }

    @Override
    public boolean onCreateOptionsMenu(Menu menu) {
        getMenuInflater().inflate(R.menu.menu_main, menu);
        return true;
    }

    // 广播自定义意图
    public void broadcastIntent(View view){
        Intent intent = new Intent();
        intent.setAction("cn.programmer.CUSTOM_INTENT");
        sendBroadcast(intent);
    }
}
以下は src/com.サンプル.broadcastreceiver/MyReceiver.java の内容です:
package com.サンプル.broadcastreceiver;

import android.content.BroadcastReceiver;
import android.content.Context;
import android.content.Intent;
import android.widget.Toast;

public class MyReceiver extends BroadcastReceiver {
    @Override
    public void onReceive(Context context, Intent intent) {
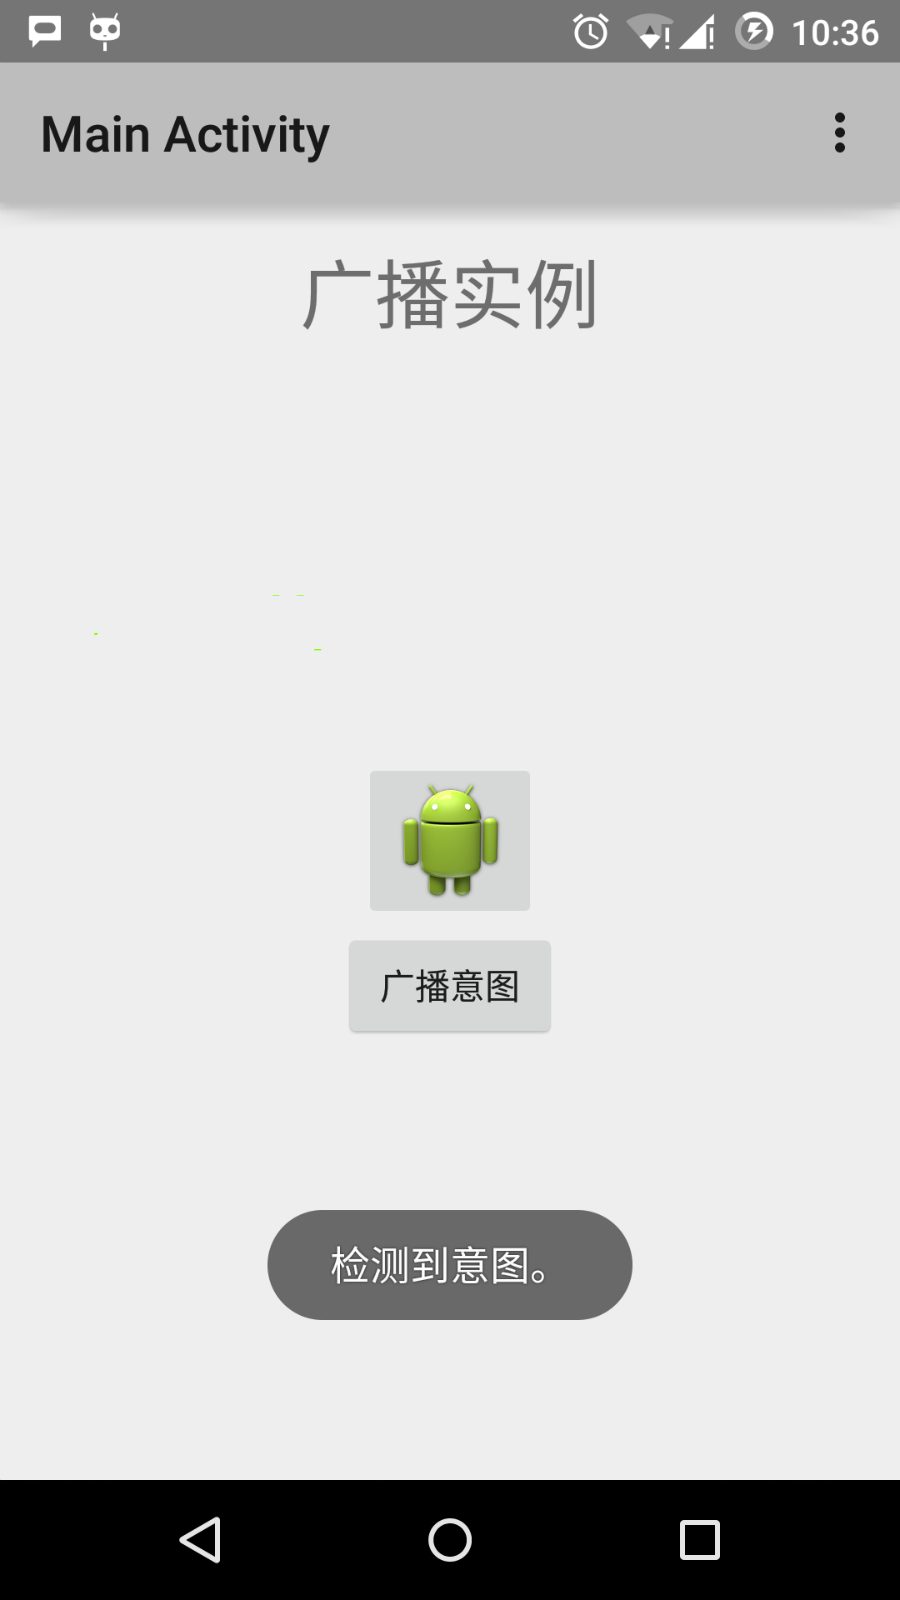
        Toast.makeText(context, "检测到意图。", Toast.LENGTH_LONG).show();
    }
}
次にAndroidManifest.xmlファイルを変更します。ここでは、<receiver.../>タグを追加してブロードキャストレシーバーを含めます:
<?xml version="1.0" encoding="utf-8"?>
<manifest xmlns:android="http://schemas.android.com/apk/res/android"
    package="com.サンプル.broadcastreceiver"
    android:versionCode="1"
    android:versionName="1.0" >

    <uses-sdk
        android:minSdkVersion="8"
        android:targetSdkVersion="22" />

    <application
        android:icon="@drawable/ic_launcher"
        android:label="@string/app_name"
        android:theme="@style/AppTheme" >

        <activity
            android:name=".MainActivity"
            android:label="@string/title_activity_main" >

            <intent-filter>
                <action android:name="android.intent.action.MAIN" />
                <category android:name="android.intent.category.LAUNCHER"/>
            </intent-filter>

        </activity>

        <receiver android:name="MyReceiver">

            <intent-filter>
                <action android:name="cn.programmer.CUSTOM_INTENT">
                </action>
            </intent-filter>

        </receiver>

    </application>

</manifest>
以下は res/layout/activity_main.xml ファイルの内容で、カスタムインテントをブロードキャストするボタンを含みます。
<RelativeLayout xmlns:android="http://schemas.android.com/apk/res/android"
    xmlns:tools="http://schemas.android.com/tools" android:layout_width="match_parent"
    android:layout_height="match_parent" android:paddingLeft="@dimen/activity_horizontal_margin"
    android:paddingRight="@dimen/activity_horizontal_margin"
    android:paddingTop="@dimen/activity_vertical_margin"
    android:paddingBottom="@dimen/activity_vertical_margin" tools:context=".MainActivity">

    <TextView
        android:id="@+id/textView1"
        android:layout_width="wrap_content"
        android:layout_height="wrap_content"
        android:text="广播实例"
        android:layout_alignParentTop="true"
        android:layout_centerHorizontal="true"
        android:textSize="30dp" />

    <TextView
        android:id="@+id/textView2"
        android:layout_width="wrap_content"
        android:layout_height="wrap_content"
        android:text="www.example.com"
        android:textColor="#ff87ff09"
        android:textSize="30dp"
        android:layout_above="@+id/imageButton"
        android:layout_centerHorizontal="true"
        android:layout_marginBottom="40dp" />

    <ImageButton
        android:layout_width="wrap_content"
        android:layout_height="wrap_content"
        android:id="@+id/imageButton"
        android:src="@drawable/ic_launcher.html"
        android:layout_centerVertical="true"
        android:layout_centerHorizontal="true" />

    <Button
        android:layout_width="wrap_content"
        android:layout_height="wrap_content"
        android:id="@+id/button2"
        android:text="广播意图"
        android:onClick="broadcastIntent"
        android:layout_below="@+id/imageButton"
        android:layout_centerHorizontal="true" />

</RelativeLayout>
以下は res/values/strings.xml ファイルの内容で、2つの新しい定数を定義しています。
<?xml version="1.0" encoding="utf-8"?>
<resources>

    <string name="app_name">Android Broadcast Receiver</string>
    <string name="action_settings">Settings</string>
    <string name="menu_settings">Settings</string>
    <string name="title_activity_main">Main Activity</string>

</resources>
変更したばかりのHello World!アプリケーションを実行してみましょう。環境のインストール時にAVDを作成済みであることを前提としています。プロジェクト内のアクティビティファイルを開き、ツールバーの アイコンをクリックして、Android Studioでアプリケーションを実行します。Android StudioはアプリケーションをAVDにインストールして起動します。すべてがうまくいけば、エミュレーターウィンドウに次のように表示されます:
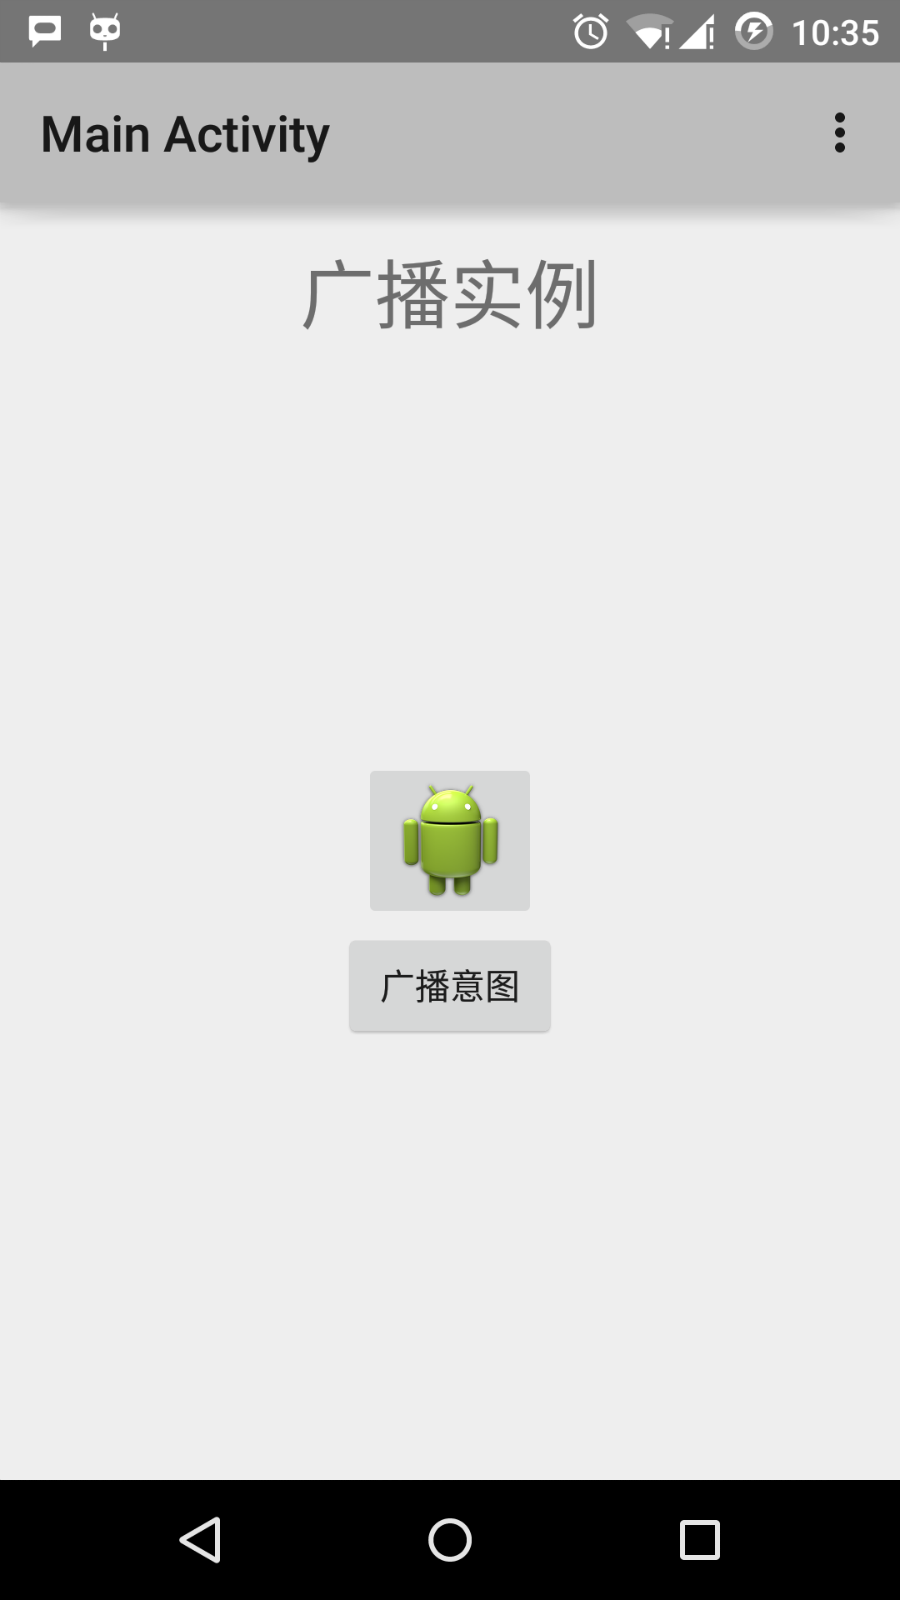
次に「ブロードキャストインテント」ボタンをクリックして、カスタムインテントをブロードキャストします。これにより、カスタムインテント「cn.programmer.CUSTOM_INTENT」がブロードキャストされ、登録済みのブロードキャストレシーバーMyReceiverで傍受され、実装したロジックが実行されます。エミュレーターの下部にトーストが表示されます。次のようになります:
システム起動、日付変更、バッテリー低下などのシステム生成インテントを傍受する他のブロードキャストレシーバーを実装してみることもできます。
その他の拡張