Android シングルフラグメント
シングルフラグメント:シングルフラグメントは、携帯端末(携帯電話)のような小画面デバイス向けに設計されており、Android 3.0 以上でサポートされています。
サンプル
この例では、独自のフラグメントを作成する方法を説明します。ここでは2つのフラグメントを作成します。1つはデバイスが横向きのときに使用され、もう1つはデバイスが縦向きのときに使用されます。それでは、手順に従って開始しましょう。
| 手順 | 説明 |
|---|---|
| 1 | Android Studio IDE を使用して Android アプリケーションを作成し、名前を Single Fragments、パッケージ名を cn.uprogrammer.singlefragments とします。 |
| 2 | 以下に示すメインアクティビティファイル MainActivity.java を変更します。ここでは、デバイスの向きを確認し、それに基づいて異なるフラグメントを切り替えます。 |
| 3 | cn.uprogrammer.singlefragments パッケージの下に PortraitFragment.java と LandscapeFragment.java の2つのファイルを作成し、メソッドを関連付けます。 |
| 4 | 2つのフラグメントのレイアウトを定義するために、レイアウトファイル res/layout/landscape_fragment.xml と res/layout/portrait_fragment.xml を作成します。 |
| 5 | res/layout/activity_main.xml を変更して、2つのフラグメントを含めます。 |
| 6 | res/values/strings.xml で必要な定数を定義します。 |
| 7 | Android エミュレーターを起動してアプリケーションを実行し、アプリケーションの変更結果を確認します。 |
以下は、メインアクティビティファイル src/cn.uprogrammer.singlefragments/MainActivity.java の内容です:
package cn.uprogrammer.singlefragment;

import android.os.Bundle;
import android.app.Activity;
import android.app.FragmentManager;
import android.app.FragmentTransaction;
import android.content.res.Configuration;

public class MainActivity extends Activity {

    @Override
    protected void onCreate(Bundle savedInstanceState) {
        super.onCreate(savedInstanceState);

        Configuration config = getResources().getConfiguration();

        FragmentManager fragmentManager = getFragmentManager();
        FragmentTransaction fragmentTransaction =
                fragmentManager.beginTransaction();

        /**
         * 检测设备方向,并做相应地操作。
         */
        if (config.orientation == Configuration.ORIENTATION_LANDSCAPE) {
            /**
             * 设备的横屏模式。
             */
            LandscapeFragment ls_fragment = new LandscapeFragment();
            fragmentTransaction.replace(android.R.id.content, ls_fragment);
        }else{
            /**
             * 设备的竖屏模式。
             */
            PortraitFragment pm_fragment = new PortraitFragment();
            fragmentTransaction.replace(android.R.id.content, pm_fragment);
        }
        fragmentTransaction.commit();
    }
}
パッケージ cn.uprogrammer.singlefragments の下に、LandscapeFragment.java と PortraitFragment.java の2つのフラグメントファイルを作成します。
以下は LandscapeFragment.java ファイルの内容です:
package cn.uprogrammer.singlefragment;

import android.app.Fragment;
import android.os.Bundle;
import android.view.LayoutInflater;
import android.view.View;
import android.view.ViewGroup;


public class LandscapeFragment extends Fragment {

    @Override
    public View onCreateView(LayoutInflater inflater,
                             ViewGroup container, Bundle savedInstanceState) {
        /**
         * Inflate the layout for this fragment
         */
        return inflater.inflate(
                R.layout.landscape_fragment, container, false);
    }

}
以下は PortraitFragment.java ファイルの内容です:
package cn.uprogrammer.singlefragment;

import android.app.Fragment;
import android.os.Bundle;
import android.view.LayoutInflater;
import android.view.View;
import android.view.ViewGroup;

public class PortraitFragment extends Fragment {

    @Override
    public View onCreateView(LayoutInflater inflater,
                             ViewGroup container, Bundle savedInstanceState) {
        /**
         * Inflate the layout for this fragment
         */
        return inflater.inflate(
                R.layout.portrait_fragment, container, false);
    }
}
res/layout ディレクトリの下に、2つのレイアウトファイル landscape_fragment.xml と portrait_fragment.xml を作成します。
以下は landscape_fragment.xml ファイルの内容です:
<?xml version="1.0" encoding="utf-8"?>
<LinearLayout
    xmlns:android="http://schemas.android.com/apk/res/android"
    android:orientation="vertical"
    android:layout_width="fill_parent"
    android:layout_height="fill_parent"
    android:background="#1662AE">

    <TextView
        android:layout_width="fill_parent"
        android:layout_height="wrap_content"
        android:text="@string/landscape_message"
        android:textColor="#000000"
        android:textSize="28sp" />

    <!-- More GUI components go here  -->

</LinearLayout>
以下は portrait_fragment.xml ファイルの内容です:
<?xml version="1.0" encoding="utf-8"?>
<LinearLayout
    xmlns:android="http://schemas.android.com/apk/res/android"
    android:orientation="horizontal"
    android:layout_width="fill_parent"
    android:layout_height="fill_parent"
    android:background="#666666">

    <TextView
        android:layout_width="fill_parent"
        android:layout_height="wrap_content"
        android:text="@string/portrait_message"
        android:textColor="#000000"
        android:textSize="28sp" />

    <!-- More GUI components go here  -->

</LinearLayout>
以下は res/layout/activity_main.xml ファイルの内容です。2つのフラグメントが含まれています:
<?xml version="1.0" encoding="utf-8"?>
<LinearLayout xmlns:android="http://schemas.android.com/apk/res/android"
    xmlns:tools="http://schemas.android.com/tools"
    android:layout_width="fill_parent"
    android:layout_height="fill_parent"
    android:orientation="horizontal">

    <fragment
        android:id="@+id/landscape_fragment"
        android:layout_weight="1"
        android:layout_width="0dp"
        android:layout_height="match_parent" />

    <fragment
        android:id="@+id/portrait_fragment"
        android:layout_weight="2"
        android:layout_width="0dp"
        android:layout_height="match_parent" />

</LinearLayout>
res/values/strings.xml ファイルに以下の内容が含まれていることを確認してください:
<?xml version="1.0" encoding="utf-8"?>
<resources>

    <string name="app_name">Single Fragment</string>
    <string name="hello_world">Hello world!</string>
    <string name="action_settings">Settings</string>
    <string name="landscape_message">这是横屏模式碎片</string>
    <string name="portrait_message">这是竖屏模式碎片</string>
</resources>
変更したばかりの Single Fragments アプリケーションを実行しましょう。インストール環境のセットアップ時に AVD を作成済みであることを前提としています。プロジェクト内のアクティビティファイルを開き、ツールバーの アイコンをクリックして、Android Studio でアプリケーションを実行します。Android Studio は AVD にアプリケーションをインストールして起動します。すべてがうまくいけば、エミュレーターウィンドウに次のように表示されます:

次の操作に従って、エミュレーター画面の向きモードを変更します:
- fn+control+F11 は Mac で横向きを縦向きに、またはその逆に変更します。
- Windows では ctrl+F11
- Linux では ctrl+F11
モードを変更すると、横向きモードに適したページの実装が表示されます:
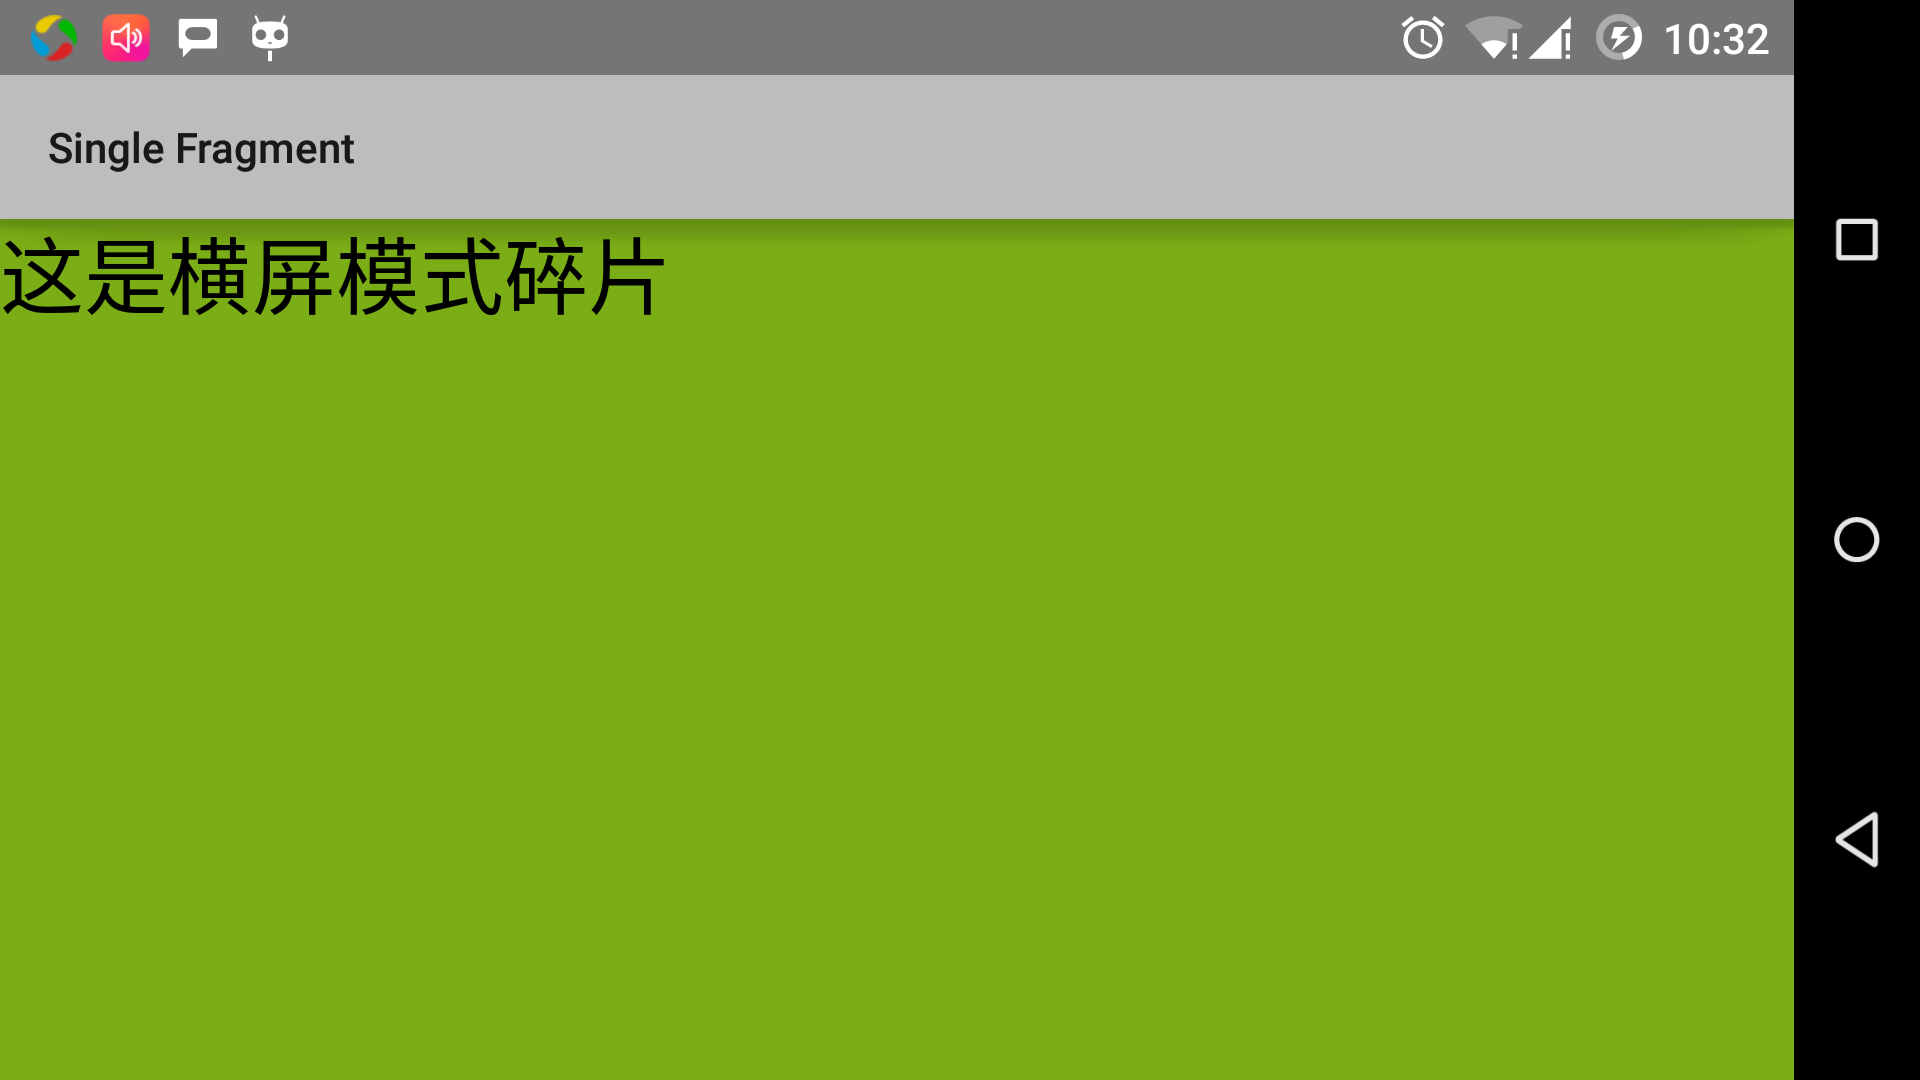
この方法により、同じアクティビティ内で異なるフラグメントを使用して、異なるインターフェースを実装できます。必要に応じて、さまざまなタイプのUIコンポーネントを使用してインターフェースを構築できます。
その他の拡張